
No products in the cart.
How to quickly build a booth with QuicklyShow materials?
Setting up a trade show booth doesn’t have to be a time‑draining chore. With QuicklyShow’s modular aluminum frames and tension‑fabric graphics, you can go from unboxing to show‑ready in under 2 hours. Follow these simple steps to assemble a professional, eye‑catching booth.
Table of Contents
- Why Choose QuicklyShow
- Step 1: Unpack and Organize
- Step 2: Assemble the Frame
- Step 3: Install the Fabric Graphic
- Step 4: Attach Accessories
- Step 5: Final Checks
- FAQs
Why Choose QuicklyShow
- Tool‑Free Assembly: Push‑button connectors require no tools—just click pieces together.
- Compact Portability: Everything packs into wheeled cases or backpacks for easy transport.
- Seamless Look: Tension‑fit fabric graphics slip on in seconds and stay wrinkle‑free.
- Customizable Sizes: From 10×10 pop‑ups to larger island booths, scale as you need.
- Cost‑Effective: Save up to 70% compared to local suppliers without sacrificing quality.
Step 1: Unpack and Organize
- Remove All Components
Unpack aluminum poles, fabric panels, counters, and hardware from the case. - Group by Type
Lay out straight tubes, curved tubes, connectors, and graphics separately. - Check Your List
Verify each numbered piece against the packing list to ensure nothing’s missing.

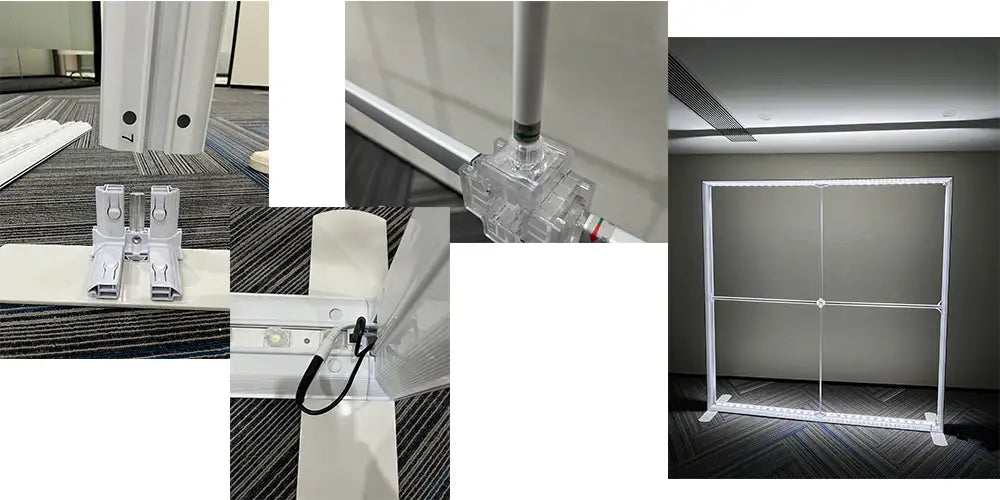
Step 2: Assemble the Frame
- Build the Base
Start with the bottom frame outline—connect straight tubes and corners first. - Add Uprights and Top Beams
Insert vertical poles, then attach top cross‑beams to complete the frame. - Listen for Clicks
Each push‑button joint snaps securely into place—make sure you hear it.
Time Estimate: One person can set up a 10×10 frame in about 15 minutes.
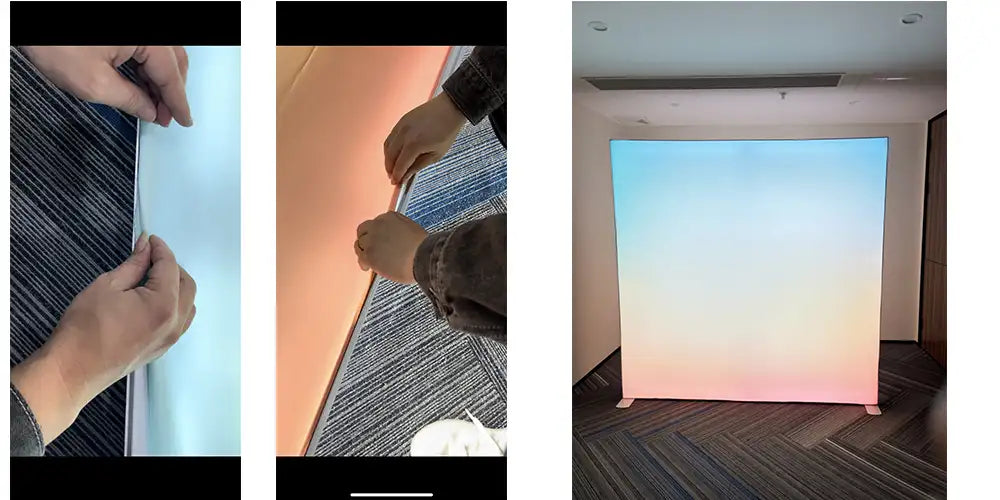
Step 3: Install the Fabric Graphic
- Drape Like a Pillowcase
Slide the printed fabric over the top of the frame. - Stretch and Secure
Pull down evenly and fasten any zippers or Velcro for a snug, wrinkle‑free finish. - Align Graphics
Adjust as needed so logos and text are perfectly centered.
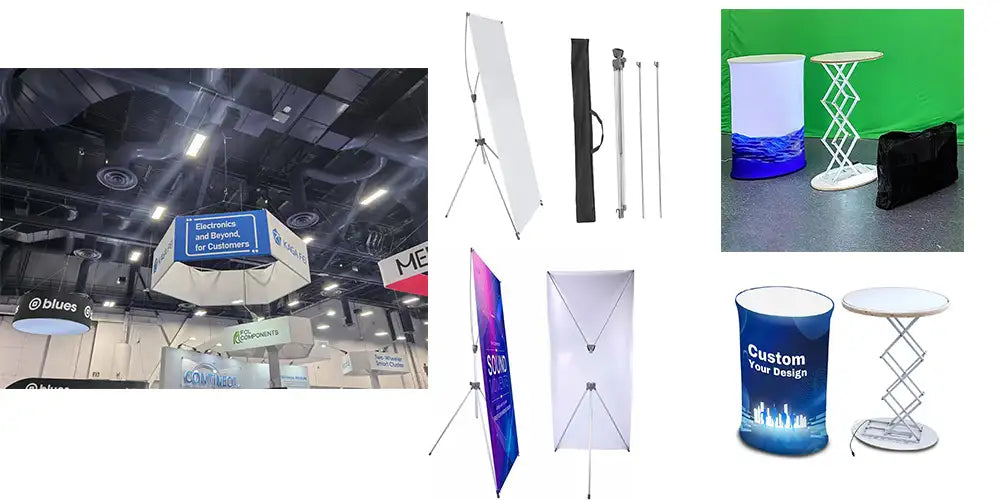
Step 4: Attach Accessories
- LED Spotlights
Clip onto the top beam to highlight key areas. - Counters & Podiums
Snap together the folding counter, which doubles as your shipping case. - Signage & Racks
Mount header signs or literature racks using included hooks.
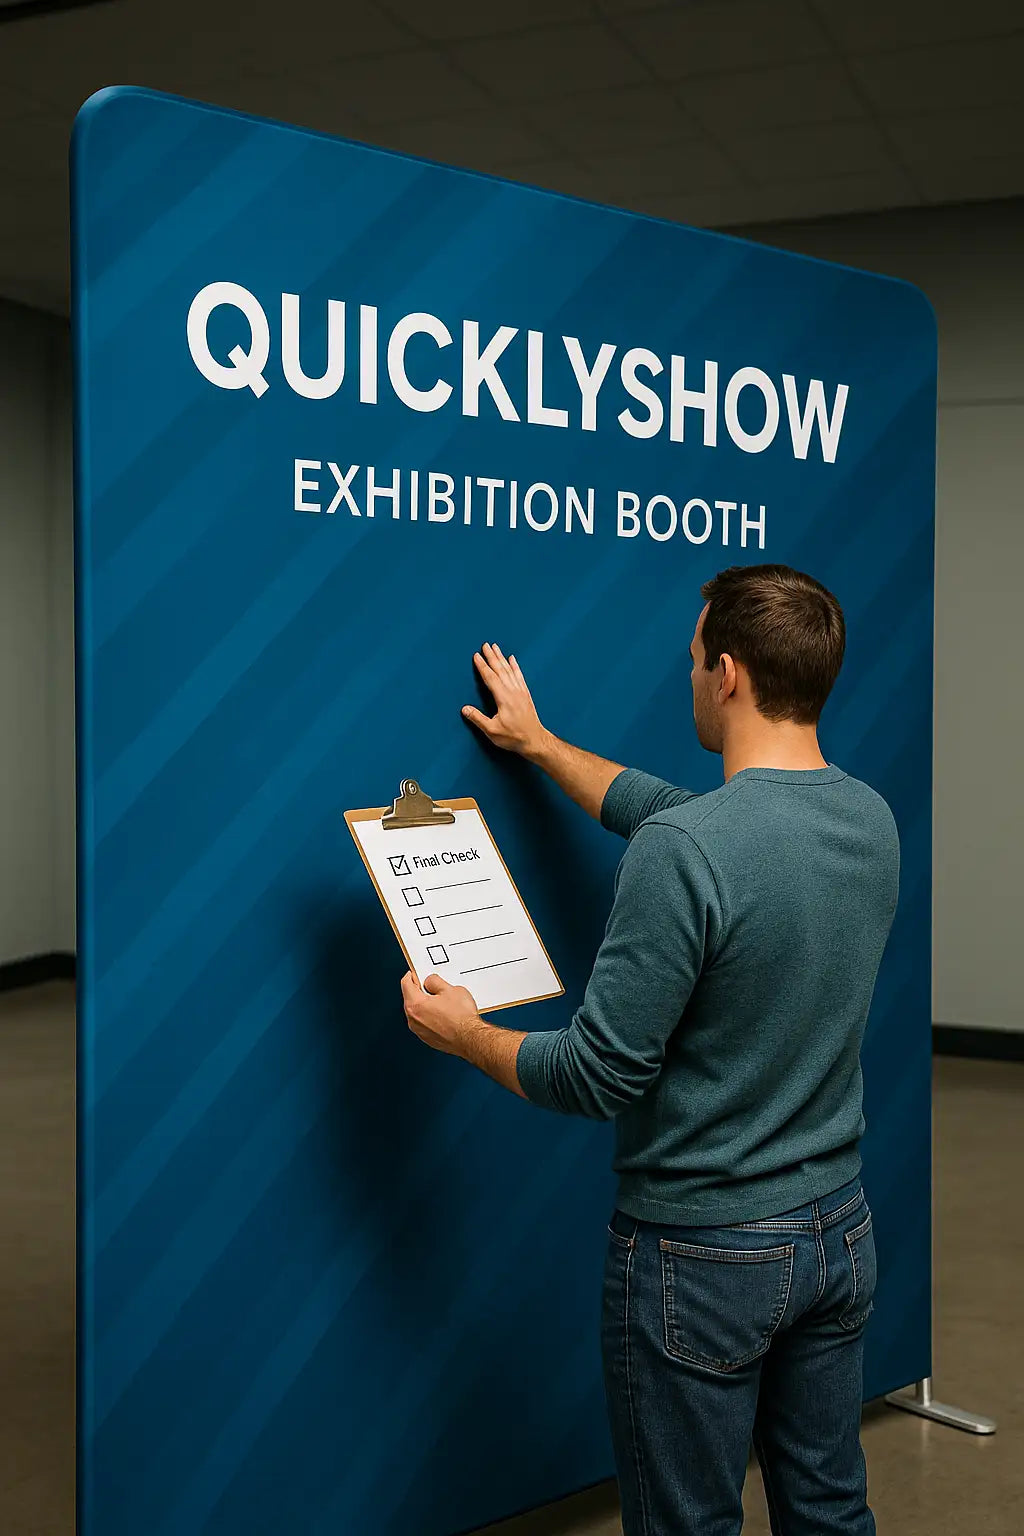
Step 5: Final Checks
- Alignment
Step back and ensure all panels are straight and graphics are centered. - Function Test
Open any cabinets, test light connections, and check that all fasteners are secure. - Tidy Up
Bundle cables neatly behind counters and remove any packaging scraps.
FAQs
Q: Can one person handle setup alone?
A: Yes—our push‑button system and light materials let a single person assemble a 10×10 booth in under 30 minutes.
Q: How durable are the fabric graphics?
A: Made from industrial‑grade, flame‑retardant polyester, they withstand repeated use and clean easily.
Q: What’s the lead time?
A: Standard production is 14 business days after artwork approval; rush options are available.
Q: Are accessories included?
A: Basic LED lights and a folding counter are included. Additional items can be ordered as needed.
We provide one-stop booth design services worldwide and have been rooted in the industry for 18 years.If you need contact us.
WhatsApp:+8615220114725 Quicklyshow Alice
WhatsApp:+8613380363717 QuicklyShow Helen