
No products in the cart.
How To Set Up An Event Tent at Your Next Outdoor Trade Show, Market, or Event
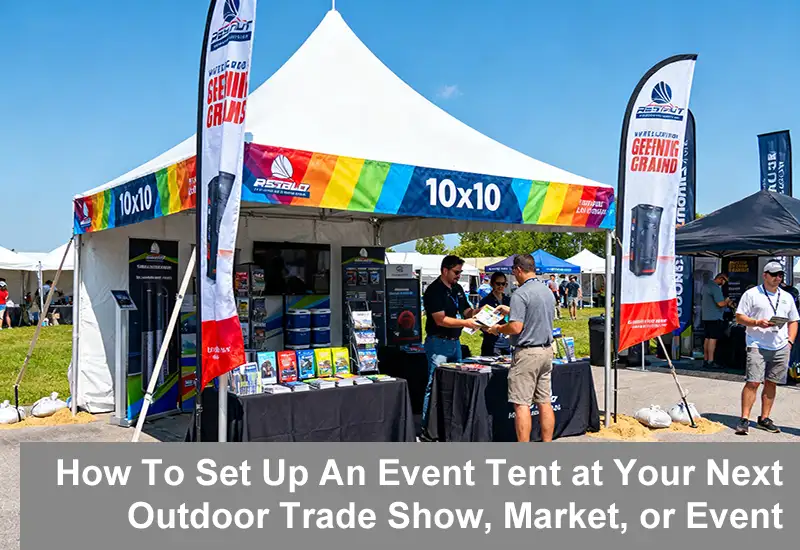
At outdoor trade shows, markets, or brand events, an event tent serves as a “mobile storefront” for showcasing your brand image. It also provides shelter from wind and rain while attracting foot traffic. Many exhibitors encounter issues such as “disorganized parts,” “delayed setup,” and “insufficient stability” when setting up a tent for the first time, which can undermine event success. This guide provides actionable steps for event tent setup, covering preparation, step-by-step instructions, stability reinforcement, and common problem solutions.
I. 3 Essential Pre-Setup Tasks for a Smooth Trade Show Booth Setup
Low setup efficiency often comes from inadequate preparation. Completing these three tasks in advance can reduce on-site setup time by over 50%:
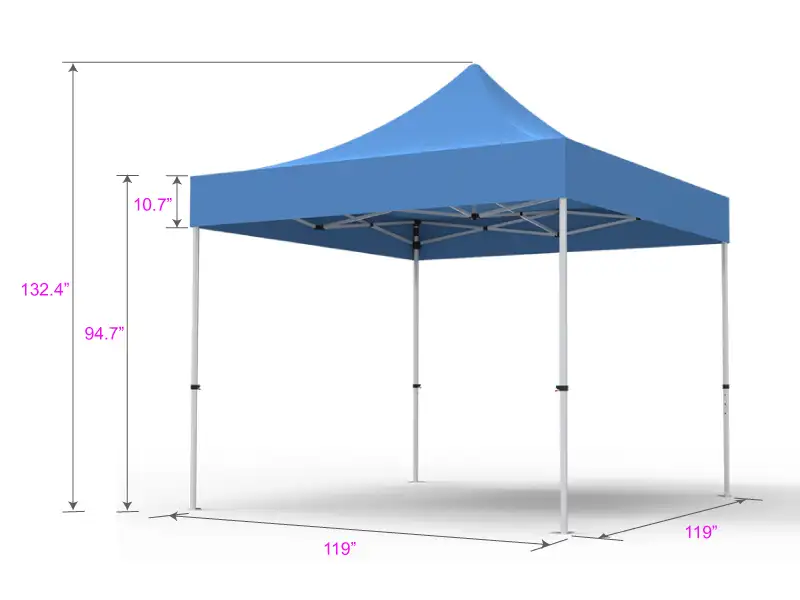
1. Ensure Tent Dimensions Match the Venue (10×10 Trade Show Displays & Event Tents)
- Measure the venue size: Confirm the allocated booth area (e.g., 3m×3m, 4m×6m, or 10×10 trade show displays). Choose a tent slightly smaller than the space (leave at least 50cm around the tent). For dense outdoor markets in cities like New York or Los Angeles, a 2.5m×2.5m tent may be more practical than a 3m×3m tent to avoid crowding neighbors.
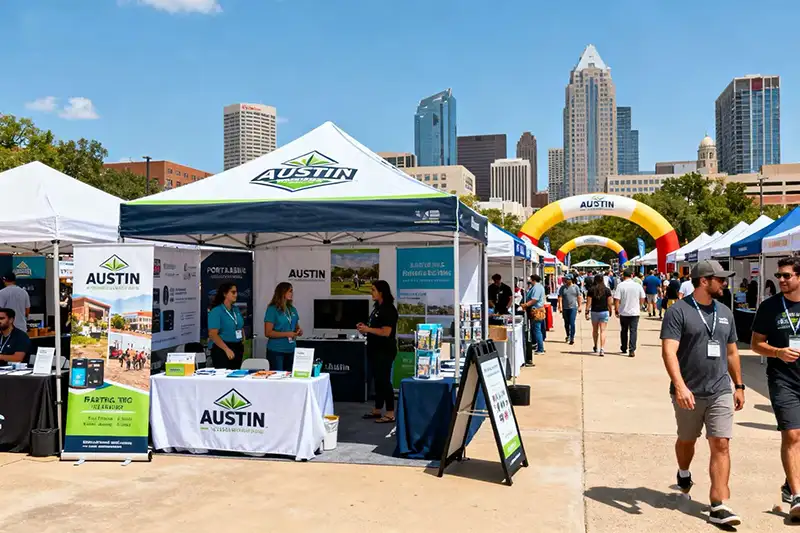
- Check the ground type: Outdoor surfaces include grass, concrete, or asphalt, each requiring different anchoring tools. For grassy fairgrounds in Austin or Nashville, use heavy-duty stakes; for concrete plazas in Chicago or Boston, prepare water-filled bases.
- Check the weather forecast: If wind speeds reach ≥4 mph or rain is expected, bring wind ropes, waterproof ground sheets, and weighted anchors. For rainy regions like Seattle or Portland, add extra waterproof tape to canopy seams and a small tarp as backup.
2. Inventory Tent Parts & Pre-Assemble Easily Confused Components (Fabric Trade Show Booth & Tension Fabric Systems)
- Core accessories:
- Tent frame (upright poles, crossbars, diagonal braces—label if possible)
- Tent fabric (canopy top and sidewalls; note door curtains/windows)
- Anchoring tools (stakes, wind ropes, sandbags/water-filled bases, buckles/wrenches)
- Auxiliary tools (gloves, tape measure, spare parts kit, extra buckles)
- Pre-assembly tip: Connect crossbars and diagonal braces into a top frame, secure with rope, and only attach upright poles on-site to save time.
3. Determine Setup Personnel & Assign Roles (Trade Show Booth Portable & Portable Trade Show Exhibits)
- Small tents (≤3m×3m): 2 people—one assembles the frame, the other hands over accessories and anchors.
- Medium tents (4m×6m to 6m×8m): 3-4 people—two assemble the top frame, one installs upright poles, one prepares anchoring tools.
- Large tents (≥8m×10m): 5+ people recommended or hire professional setup services to handle heavy frames safely.
II. Step-by-Step Event Tent Setup for Outdoor Trade Shows
Using a common 3m×3m folding event tent, setup typically takes 30–40 minutes:
Step 1: Clear the Venue & Mark the Ground (Trade Show Booth Canada & Outdoor Event Tent)
- Remove gravel, weeds, and sharp objects.
- Mark the 4 upright pole positions using tape measure and chalk (ensure diagonal lengths are equal).
Step 2: Assemble the Tent Frame (Box With LED Lights & Fabric Trade Show Booth)
- Unfold the top frame: Two people pull outward until fully expanded (listen for a “click”).
- Check that all buckles are secured.
- Install upright poles: Align top connectors, rotate or press until fixed. Lift frame slowly to marked ground positions.
Step 3: Cover & Secure the Tent Fabric (Tension Fabric Systems & Marketing Banners for Booths)
- Cover canopy top: Two people unfold canopy, align corners, fasten to upright poles/hooks.
- Install sidewalls if needed: Secure top hooks and side Velcro/ropes. Leave entrances open as necessary for airflow.
Step 4: Ground Anchoring & Stability Reinforcement (Portable Trade Show Exhibits & Trade Show Arch)
- Grass/dirt: 30cm stakes at 45° with wind ropes. Add intermediate stakes for strong winds.
- Concrete/asphalt: Water-filled bases (≥20L) or sandbags (≥10kg) at each pole. For larger tents, add extra wind ropes tied to fixed objects.
Step 5: Final Inspection & Safety Hazard Check
- Walk around tent to check for loose frames, fabric, or wind ropes.
- Shake upright poles gently; add stakes or weight if needed.
- Ensure waterproofing is in place and drainage around tent is clear.
III. 3 Stability Reinforcement Tips for Outdoor Weather
- Diagonal Pull + Tiered Anchoring: Pull wind ropes at 30°–45° angles, add intermediate stakes.
- Add Weight + Anti-Slip for Upright Poles: Rubber mats under bases, extra sandbags on top.
- Pre-Tighten Canopy: Avoid sagging and water accumulation; use a support rod if available.
IV. Common Setup Problems & Solutions
- Buckles won’t lock: Clean debris, pull outward slowly.
- Fabric misaligned: Confirm canopy matches frame, ensure top frame fully unfolded.
- Tent tilts: Adjust pole distances and frame connections.
- Leaking tent: Apply outdoor waterproof tape; cover large tears with a plastic sheet temporarily.
V. Post-Setup Finishing Touches (Pull Up Banners for Trade Shows & LED Light Boxes)
- Optimize layout: Anti-slip mats, wide aisles, portable fans for hot climates.
- Highlight brand identity: Hang marketing banners for booths, install LED spotlights, or string lights.
- Prepare emergency items: First-aid kit, umbrellas, trash cans, blankets/hand warmers if cold.
VI. Frequently Asked Questions (FAQ)
- How long to set up an outdoor event tent?
- 3m×3m: 30–40 mins (2 people)
- 6m×8m: 1–1.5 hours (3–4 people)
- 8m×10m: 2+ hours (5+ people)
- Can one person set up a 3m×3m folding tent?
- Possible but not recommended; at least one helper is safer and faster.
- Best anchoring method in windy conditions?
- Grass/dirt: 30cm stakes + crisscrossed wind ropes + intermediate stakes
- Concrete/asphalt: ≥20L water-filled bases or sandbags + extra wind ropes
- Special tents for rainy areas?
- Use waterproof canopy with heat-sealed seams, sloped top, extra waterproof tape, and a backup tarp.
- Can I reuse an event tent?
- Yes, with proper care: clean, dry, and inspect frame. Can last 3–5 years.
Conclusion: Core Principles for Efficient Event Tent Setup (Trade Show Displays Austin TX & Trade Show Booth Portable)
- Prepare in advance, follow the order, prioritize stability.
- Inventory parts and confirm venue conditions.
- Follow frame → fabric → anchoring order.
- Reinforce stability based on ground and weather.
- Practice 1–2 days in advance for smooth on-site setup.
For advice on choosing event tents, portable trade show exhibits, or 10×10 trade show displays, contact us for professional guidance.
We provide one-stop booth design services worldwide and have been rooted in the industry for 18 years.If you need contact us.
WhatsApp:+8615220114725 Quicklyshow Alice
WhatsApp:+8613380363717 QuicklyShow Helen